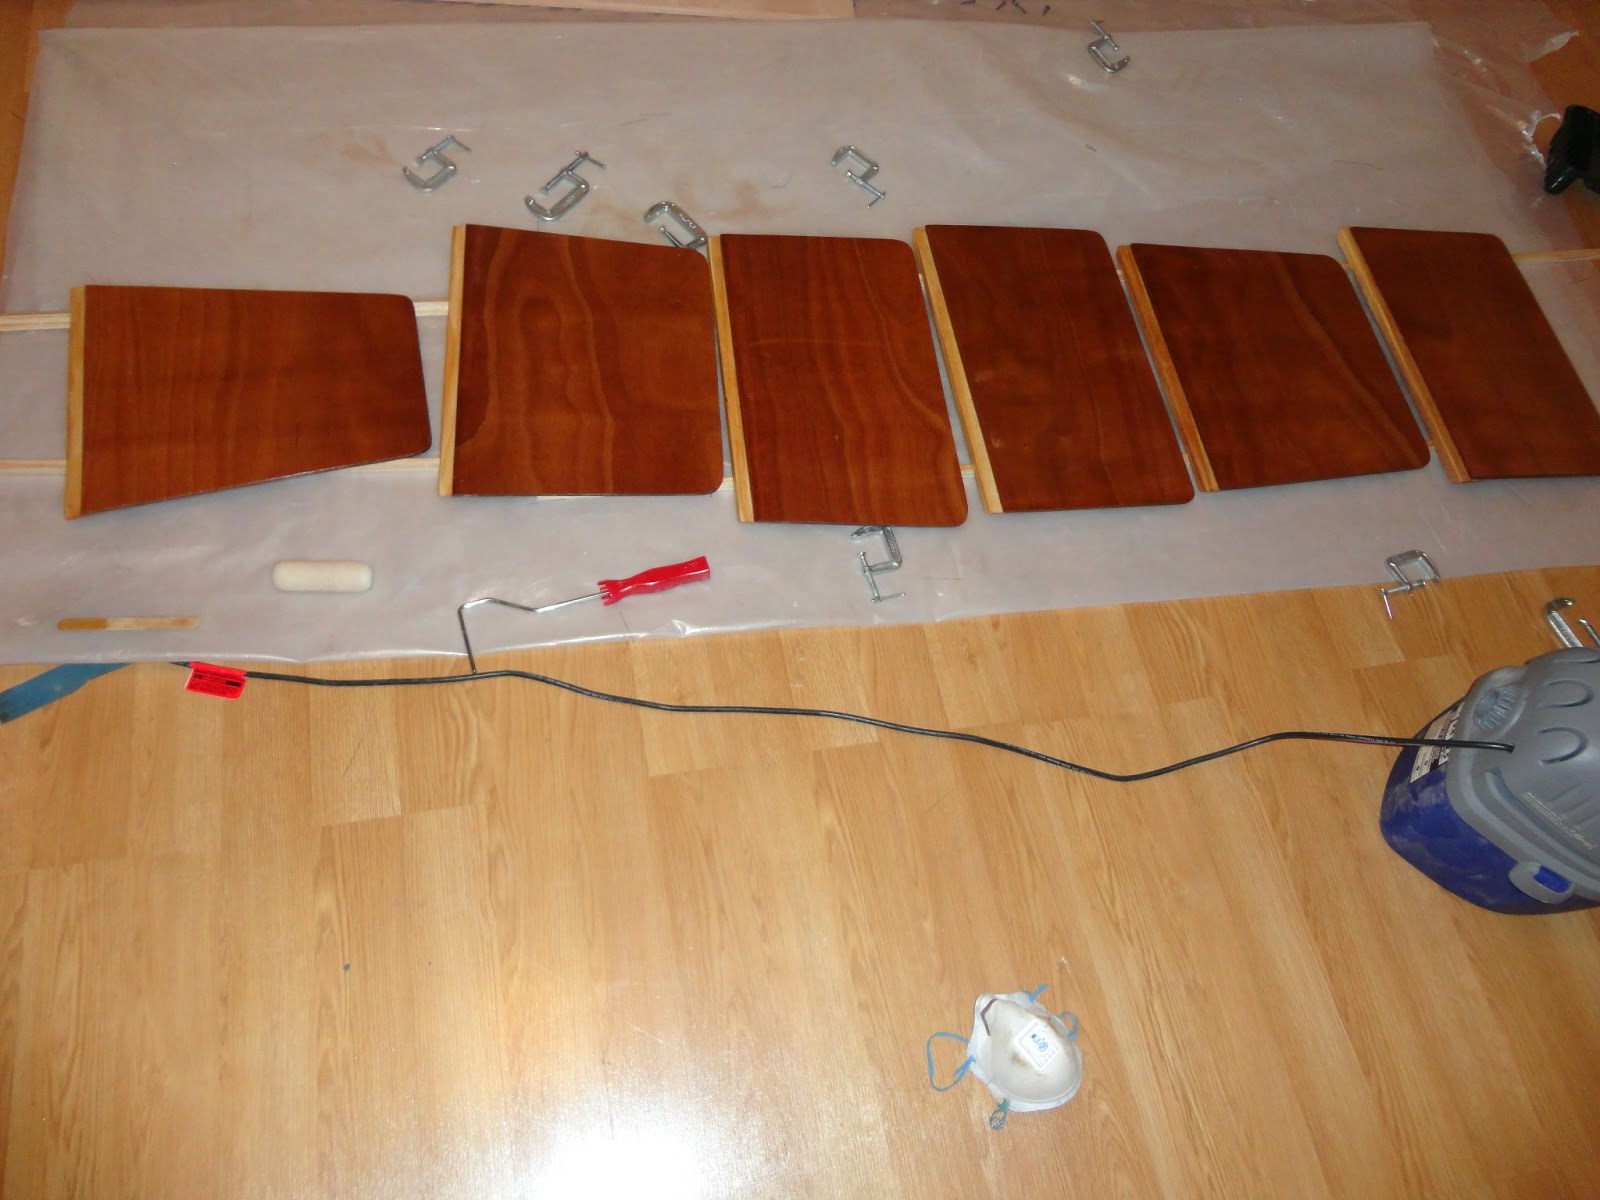
I got both of the tillers glued up. The curve between the two is identical, but I experienced about an inch and a half of spring back when I released the clamps. This shouldn't be a problem, though. The tillers are curved to enable Ackerman Differential Steering. Basically, like a car, the other hull will need to travel faster than the inner hull when turning, and the differential steering allows the rudders to turn at seperate degrees. The inner rudder will be turned less and the outer more in order for the outer hull to spin around faster and catch up. I have also started up the installation of the beam compression struts. The tillers will undergo extensive sanding and shaping in a short while. Here are some pictures.
Tuesday, February 26, 2013
Wednesday, February 20, 2013
Small Projects
I wasn't able to get any work done on the boat over the past two weeks, because I was out of town for some work stuff. The good news is that the two week break got me amped up to start building hard again. I have decided to stop working on the hulls for a bit because I want it to get a little warmer out, and I'm also kind of burnt out on them for right now. This short time will also allow me to get some of the smaller parts done for later on. That way, when the hulls become complete, I can go sailing and not have to worry about making the tillers, tiller bar, gaff, beams, etc etc etc. Two finished hulls should mean ready to roll in my book. This week I'm working on the tillers, tiller bar, and gaff. I spent a laborious day ripping all of these pieces out of 2x6 Douglas Fir boards. Needless to say, the diabolical table saw and I had a few altercations that ended in it getting kicked a bunch and even thrust onto it's side. The problem is that the fence on my circa 1991 table saw is a POS. It is old and rusty, and it moves because it doesn't clamp down properly. Today I had a revelation, however, and decided to use the 2x10x4' long piece of Mahogany as a fence. It clamped down so beautifully, and it held tight, not even trying to budge while board after board walked past. It was as if the mahogany was shouting thank you for bringing it out of the dim, dark closet and into the bright, warm sun outside. Needless to say, the mahogany will be my fence from now on until it has to itself be cut down into miscellaneous parts. Anyways, I ripped the tillers, tiller bars, gaff, and lumber for the beam compression struts, as well as making the spacers for the tillers. I will glue up the tillers and tiller bar tomorrow, and start working on the gaff. I am hoping to have all three complete (minus coating and shaping) by Friday night. After these are done, I'm going to jump into the beams and knock them out. Hopefully after that I will be refreshed and ready to knock out the hulls and fair and sand and paint and assemble and make trailer and rig and......................etc.
All the pieces clamped for rough idea. Tillers will be forced to curve ten inches when actually glued.
Friday, February 1, 2013
Why "Beto"?
Well Beto is a pretty unusual name for a sailboat, or any boat for that matter. It started with my friend Sean and me sailing a Nacra F18 all summer, and reading all of the stories about people crossing oceans on sport cats. Through a little looking around, we came across Beto Pandiani. The first voyage of his that we saw was a Pacific Crossing on a 25' Sailing One sport cat. It was basically a 25' F18. He custom made wings with little sleeping pods on them and lawn chairs on the back for a more comfortable helm. It turned out that Beto has been doing all sorts of journeys on sport cats. His first voyage was from Miami to Brazil on a Hobie 21. He has also crossed Cape Horn, sailed the Drake Passage, and sailed to Greenland on these small boats. So if you can't tell, we were inspired by Beto and his voyages. He sailed scary passages on a Hobie 21, and we are building a Tiki 21. Every time we sailed through a nasty squall on the Nacra, we were always yelling BETO! in his honor, so it's only natural that the name stuck around. Moitessier was inspired by Slocum, and we are inspired by Beto!

Beto in the Southern Ocean
Flickr album of all of the voyages
http://www.flickr.com/photos/betopandiani/

Beto in the Southern Ocean
Flickr album of all of the voyages
http://www.flickr.com/photos/betopandiani/
Bunks Glued
Today I sanded down the second coat of epoxy and finally glued the fixed bunk sections in (port hull). I can't wait for these to cure so i can fillet them and start sleeping in the hull a little bit. Once I get these filleted, I'm going to bring the starboard hull up to speed. I need to install the stiffeners, shape and attach bunk bearers, coat bunks, and tape the bilge and keel fillets on it to get it to the same point as the port hull. The bunks are already cut, which will save time, and I have gotten better with the glass tape and stuff which will save time as well. I learn/ figure out everything on the port hull (which will be mine upon completion), so the starboard hull is typically quicker and easier as a result, and typically looks better :/ We want just an overall workboat finish, but I think it's looking pretty nice so far. I can't wait to varnish the cabins. Varnish will be more maintenance, but I favor the warm feel and look of the wood finish inside. During winter, a white painted cabin just looks and feels cold to me.
Wednesday, January 30, 2013
I gave all of the bunks their first coat of epoxy today, and I did the final coat in all of the bilges in preparation for the bunk installation. I also knocked out a few more fillets in the starboard hull and milled down the lumber for the tillers on the table saw.
Second from the left is the fixed bunk section that sits underneath the main hatch. The stock width (fore and aft) is a small 12". The narrow width, to me, makes for a bit of an awkward sitting position when my feet are the in the bilge. I basically have to be sitting with my back completely straight, and I can't really recline against the bulkhead. Maybe this is because I'm six feet tall. Anyways, I ended up extending the width to 14", and after testing it out, I really appreciate this mod.
Tuesday, January 29, 2013
Warm Weather!
Today was an outstanding 70 degrees, and I managed to glue up the bunk bearers to the bunks, fill the screw holes in the port hull, and get some starboard hull fillets done. I also sanded and rounded the corners of the starboard hull diagonal stiffeners. Tomorrow I'm going to final coat the bilges after a little sanding to prepare for bunk installation. I'm also going to coat the bunks and stiffeners with the first coat of epoxy. Oh yeah, I also made some mini-fillets along the top edges of the diagonal stiffeners in the port hull, to give it some real pizzazz. It turns out that slacklining in conjunction with boat work helps me relax and get some frustration out. I can take a break whenever I need it, and head to the front yard for some balancing!
Thursday, January 24, 2013
Wind Vane
Today graced me with exceptionally cold temperatures, and I decided to get all of the wind vane parts cut out. I'm glad I did, because the thing looks really cool! I still have to glue on the arm for the weight and epoxy everything etc etc, but here are some pics of what it looks like right now. I just nailed the 2x4 as a temporary fix at the base of the mount. There will also be a post that the vane stands on, but you can't do everything in one day, so those pictures will have to come later on. I'm stoked about the idea of sitting in my hull under a dodger while the vane steers away with no gripes or complaints. It's going to be awesome.
Subscribe to:
Posts (Atom)